Importing Files
To do this, LEGION Model Builder must be open.
- Within LEGION Model Builder, select File > Import CAD.
- Browse to the CAD file to import, select it and click Open.
- Check the contents of the window and click OK to move on.
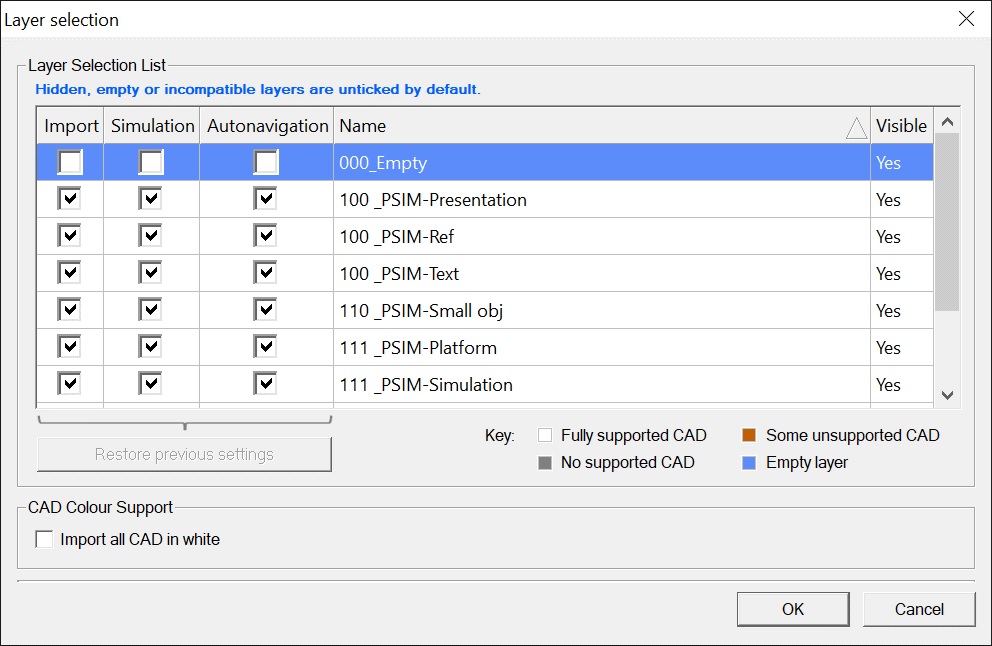
- For each Layer to be imported, ensure that the Import tick box is ticked. To exclude a Layer, untick the box.
- For each Layer to be imported as Simulation CAD, ensure that the Simulation tick box is ticked. To exclude a Layer, untick the box.
- For each Layer that contains small objects which Autonavigation should ignore, ensure that the Autonavigation box is unchecked (this saves on memory and permits more accurate pedestrian movement).
- By default, each Layer has all import options ticked if the Layer is not empty and all CAD therein is compatible. The Restore previous settings button can be used to set Layer states to the values they had after the last successful import. See the subsequent section Restoring Previous CAD Import Settings at end of this section.
- Click OK to continue with the import.
- To import all CAD lines as the opposite of the current background colour, check the box marked Import all CAD in black or Import all CAD in white.
- Click OK. The CAD Import
progress bar is displayed. If an imported CAD Layer name matches a CAD Layer
already in the model, a prompt asks how to deal with this:
- Automatically rename the CAD Layer = the Layer being imported is given a new name that does not exist in the model.
- Use the existing CAD Layer (already present in model) = the Layer is not imported from the CAD file, and the existing Layer remains in the model.
- Overwrite existing CAD
Layer (use newly imported) = the contents of the existing Layer are deleted,
then CAD elements from the CAD file are added to it. This effectively replaces
the existing Layer.
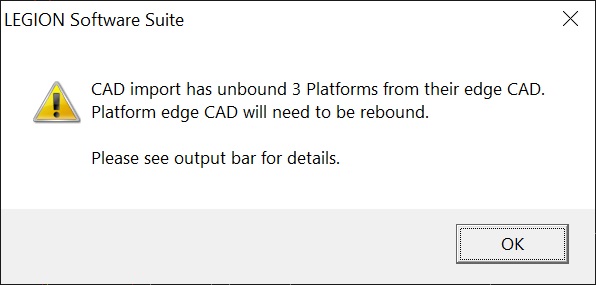
- If overwriting a CAD Layer bound to Platform-Train Interface Platform objects (see Platform-Train Interface (PTI) topic), those Platforms are automatically unbound. An alert is shown after import:
- Affected Platforms are listed in the Output Bar. Clicking on a message will select the Platform object in the CAD workspace:
- When progress is complete, the Drawing Units/Scale dialog opens.
- Ensure the Drawing units and Drawing scale settings are correct for the CAD plan being imported.
- Check the box marked Adjust model dimensions to fit imported geometry (this ensures that the LEGION model is large enough to contain the obstacles on your imported plan).
- Click OK.


After importing CAD, make sure that the correct CAD Layer is active. See Making Layers active.
Restoring Previous CAD Import Settings
By default, each Layer has all import options ticked if the Layer is not empty and all CAD therein is compatible. This happens each time you import CAD into a model, which can be inconvenient if CAD is frequently re-imported and different Layers require different import options.
For example, at the first CAD import the import options are configured like this:

When the OK button is clicked in the Layer Selection dialog, the import options of each named Layer are stored so they can be used again (i.e., restored) later.
Subsequent imports will set Layer import states to their default values (because LEGION Model Builder does not whether it should repeat the previous settings or start again):
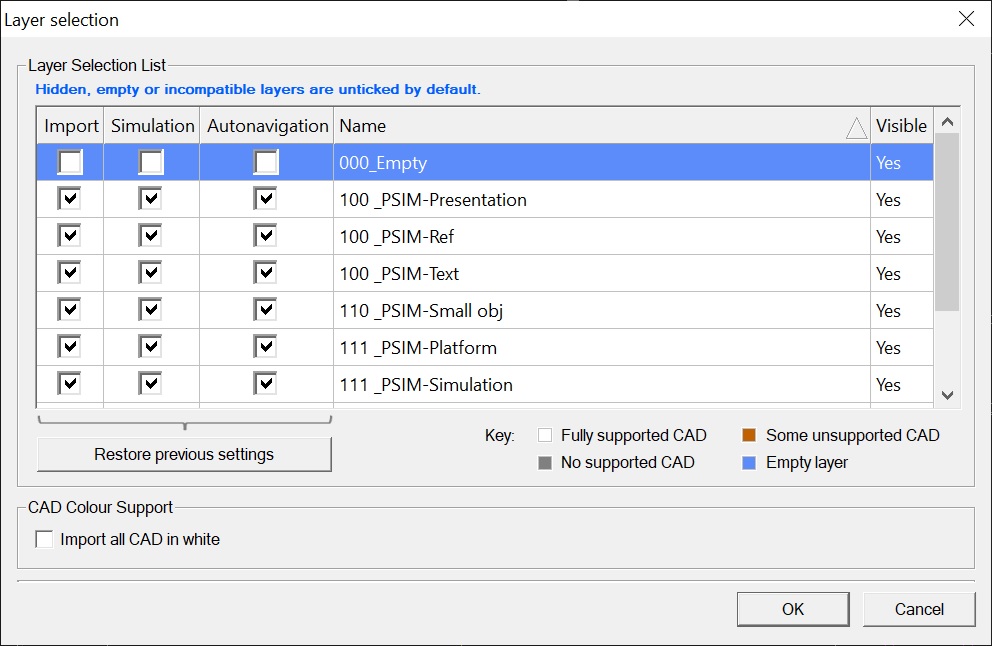
Import, Simulation and Autonavigation tick-boxes can be restored to their previous settings by clicking the Restore previous settings button.

Import options are stored for each named Layer, so if the Layer still exists in the current CAD file its options will be restored to their previous import states.
